


Vertica Integration with Dundas BI: Connection Guide
About Vertica Connection Guides
Vertica connection guides provide basic instructions for connecting a third-party partner product to Vertica. Connection guides are based on our testing with specific versions of Vertica and the partner product.
Dundas BI Overview
Dundas BI provides a set of tools that allows you to view, analyze, and transform your data using comprehensive business intelligence capabilities.
You can connect and integrate Dundas BI with Vertica in real-time and on any device from desktop to mobile. You can run Dundas BI on-premises or in a cloud environment.
Dundas allows you to:
- Create interactive and customizable dashboards and reports.
- Run ad-hoc queries.
- Analyze your data and performance.
Vertica and Dundas BI Software Versions
This document provides guidance using the software listed as follows:
| Software | Version |
|---|---|
| Dundas Client |
Dundas BI 7.0.1.101 |
| Desktop Platform |
Windows Server 2016 |
| Vertica Client |
Vertica ADO.NET 9.3.1 |
| Vertica Server |
Vertica 9.3.1 |
Installing Dundas BI
Before downloading and installing Dundas BI, review the Dundas BI System Requirements page for hardware and software requirements.
- Go to the Dundas BI download page.
- Click DOWNLOAD NOW
-
Complete the registration criteria, and click Submit.
You will receive a verification email.
- Click the download link from the email to access the download page.
-
Run the Dundas BI executable (for example, Dundas.BI.Setup.x.x.x.xxxx.exe) to install the product.
For detailed installation and configuration instructions, see the Dundas installation documentation.
Important Dundas BI is a web-based server application that requires IIS and access to Microsoft SQL Server or PostgreSQL for storing application data. The IIS server and metadata database should be up and running before you try to connect.
Installing the Vertica Client Driver
Dundas BI uses the Vertica native connector to connect to your Vertica database. Download and install the Windows ADO.NET driver on your Dundas BI client machine as follows:
- Go to the Vertica Client Drivers page on the Vertica website.
-
Download the required client driver that is compatible with your Vertica server version.
Note
For details about client and server compatibility, see Client Driver and Server Version Compatibility in the Vertica documentation.
- Based on the client driver package you downloaded, follow the installation instructions in the Vertica documentation.
- For ADO.NET, double-click the installer and follow the prompts.
Connecting Dundas BI to Vertica
Follow these steps to connect Dundas BI to Vertica:
-
Use the Dundas administrator account you set up during installation to log in to your Dundas BI website using a browser. The URL is provided to you at the end of the installation process, for example:
http://<myDundasServer>:8000/. -
After you log in, the Getting Started window appears:
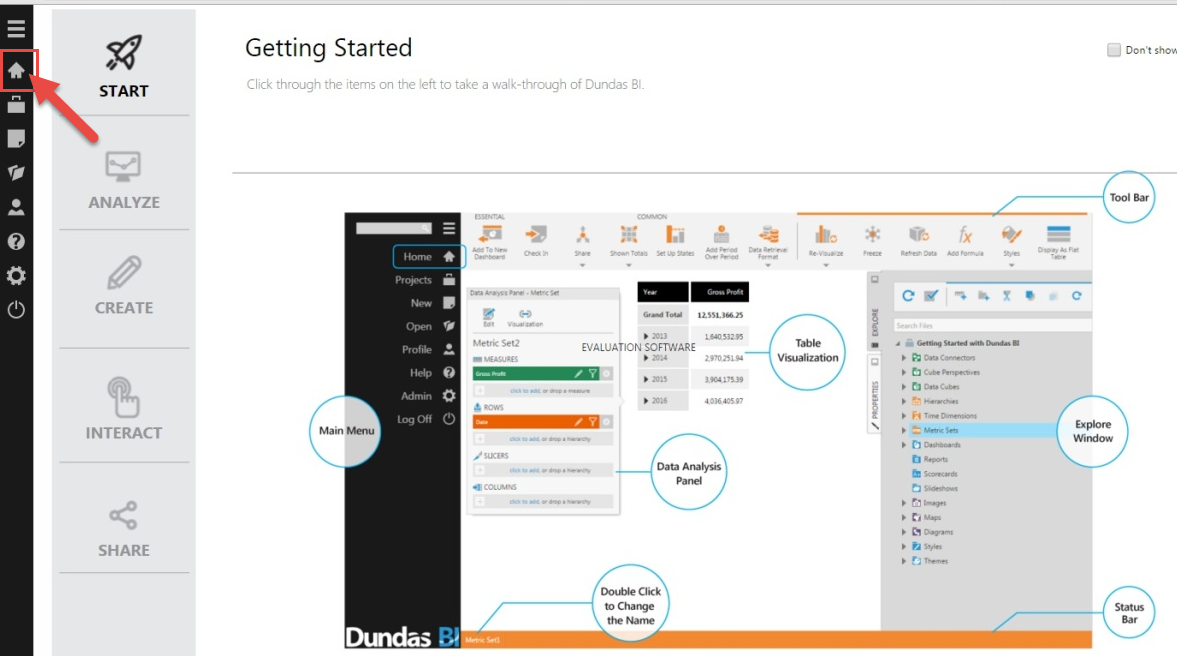
-
In the Getting Started window, click the Home icon.
The Welcome Home screen appears.
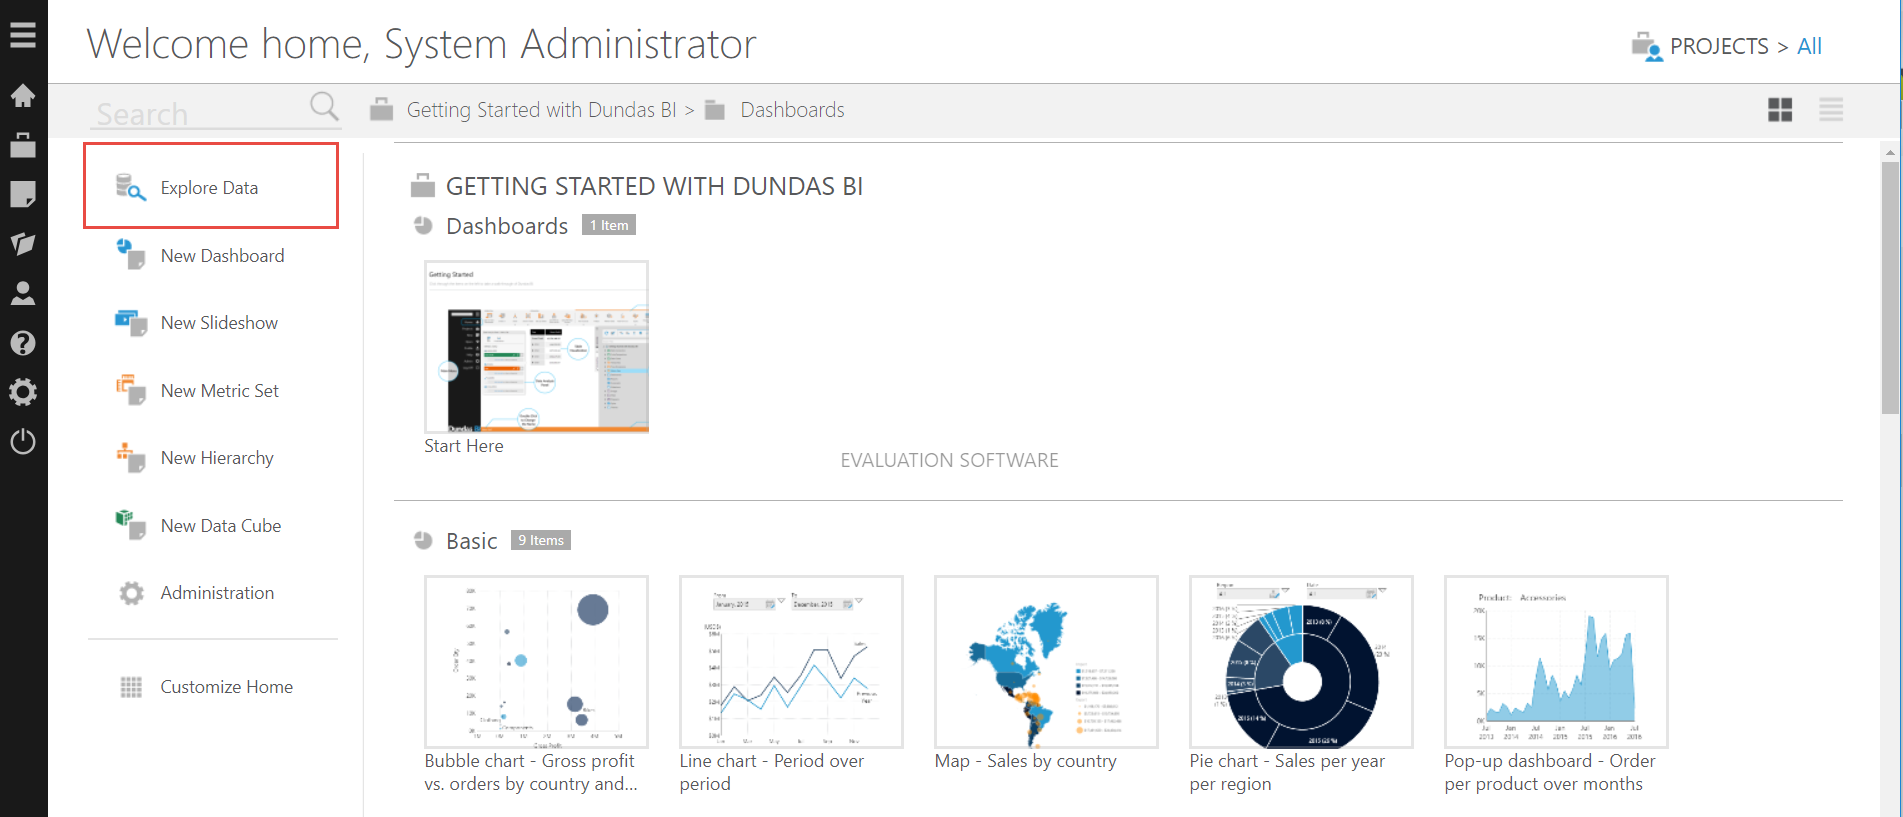
-
Select Explore Data.
-
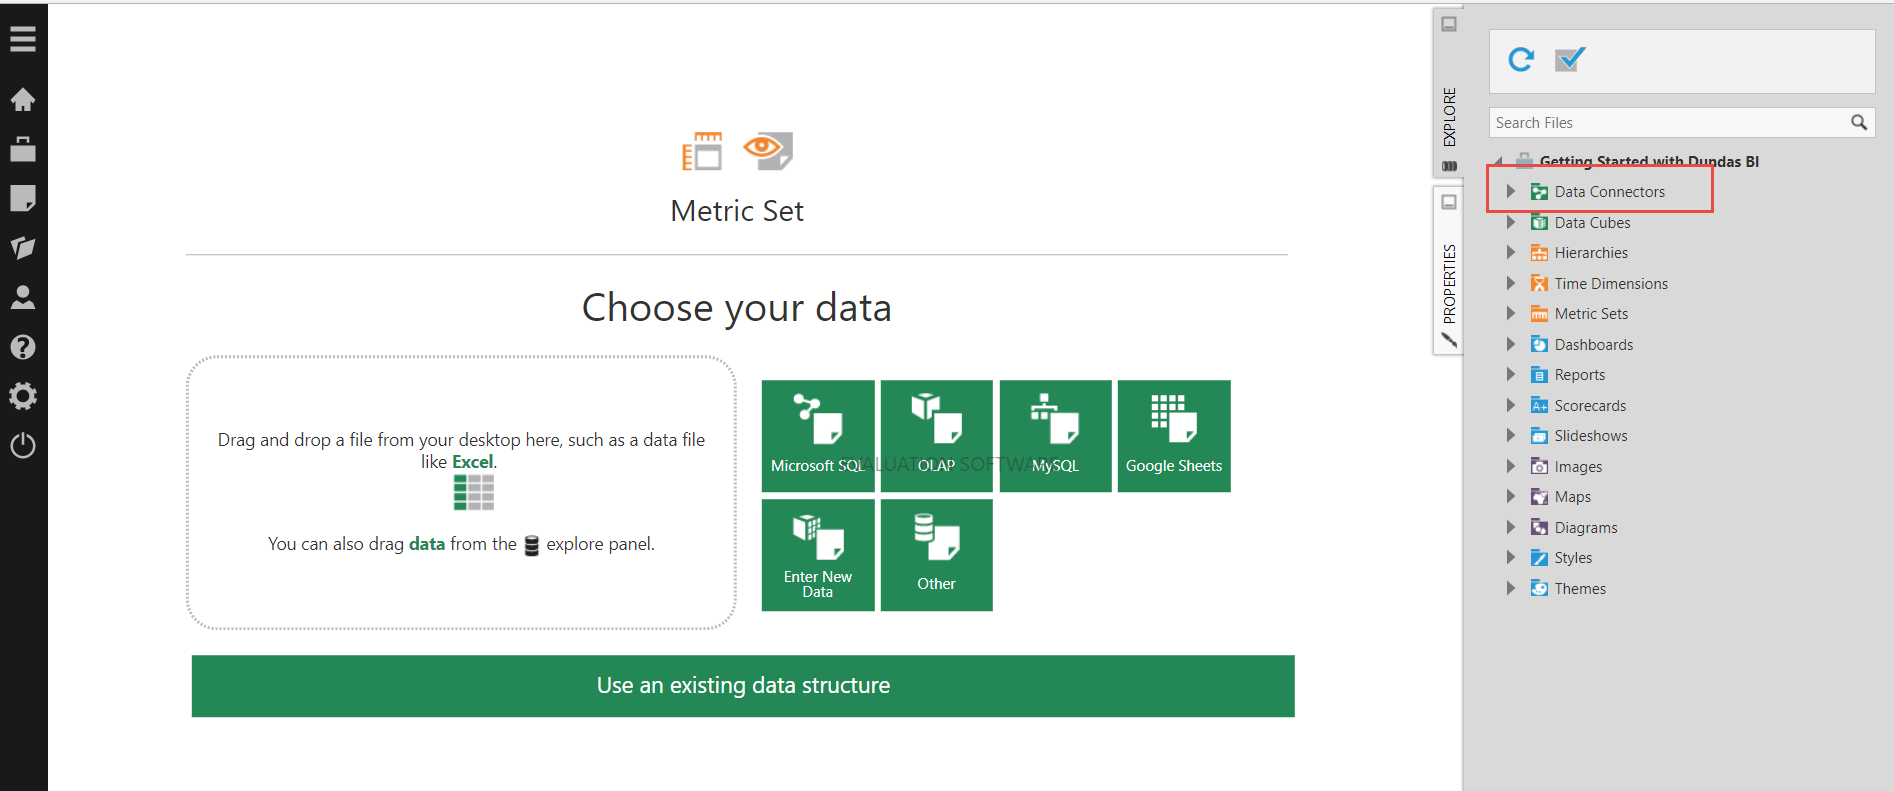
Select Data Connectors from the right pane. The following toolbar appears:

-
Select the New Data Connector icon.
The New Data Connector window appears on the left pane of the screen.
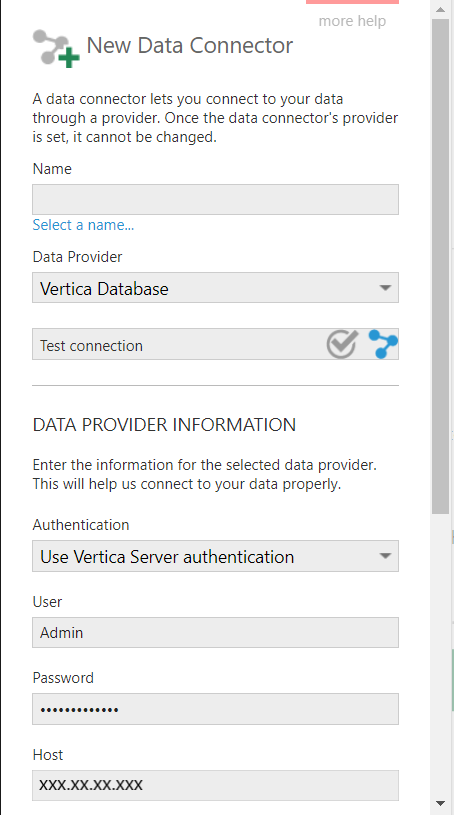
- From the Data Provider drop-down list, select Vertica Database.
-
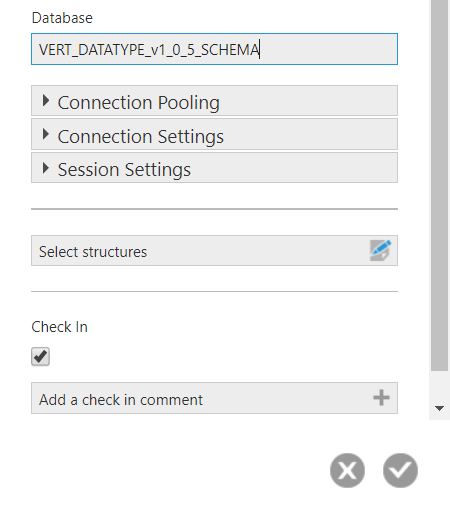
Enter the following information:
- Authentication
- Login credentials
- Host IP address
- Database name
- Connection pooling parameters
- Connection settings parameters
- Session settings parameters
- Click Test connection to verify the connection.
- After you verify the connection, click the check icon at the bottom-right of the screen.
Working with Vertica Data
Follow these steps to select the data you want to work with:
- Click the Home icon on the upper-left side of the screen to return to the Welcome Home page.
-
Click Explore Data.
The Metric Set screen appears.
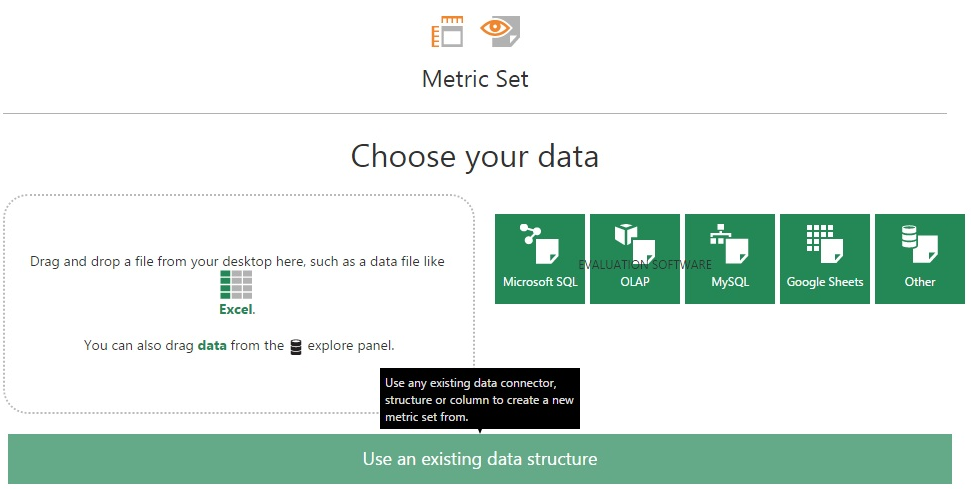
A metric set is an object that allows you to work with your Vertica data. You can define measures, dimensions, filters, sorting, hierarchy, and sort and transform your data. You create a visualization of that data using the characteristics specified in your metric set.
-
Click Use an existing data structure.
A list of objects in the schema is displayed.
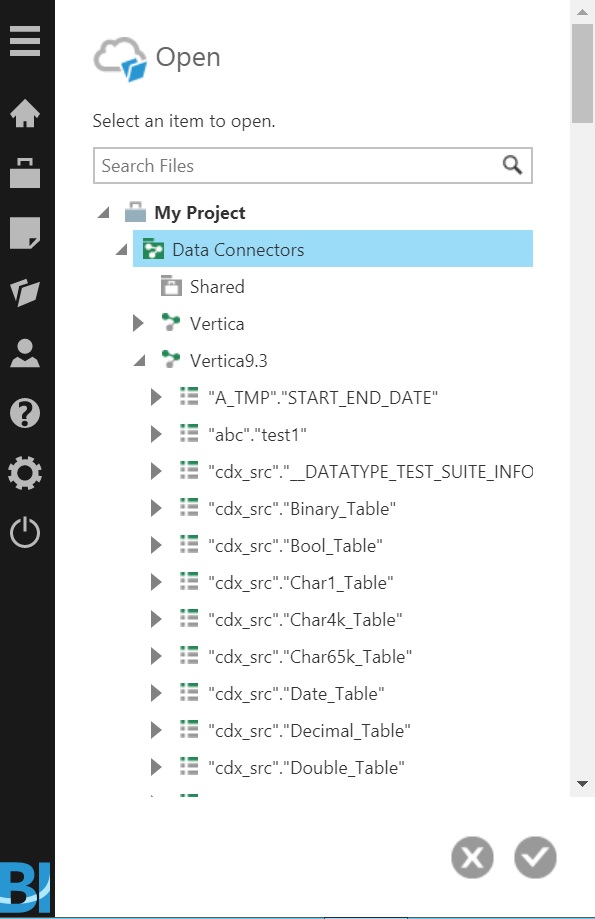
-
Select the table you want to work with and click the check icon to view the details of that table:

Now you can view, transform, and make visualizations of the data in your Vertica database.
Troubleshooting
You may encounter some issues when connecting Vertica to Dundas BI on Windows Server 2016.
Issue
If you are displaying data from Vertica using the ADO.net driver-nativeConnector, you may receive the following error:
Could not load file or assembly 'MicrosoftSqlServer.TransactSql.ScriptDom, Version=12.0.0.0, Culture=neutral,PublicKeyToken=89845dcd8080cc91' or
one of its dependencies. The system cannot find the file specified.
Solution
Download and install the package ENU\x64\SqlDom.msi from Microsoft Download Center. Restart Dundas BI and try again.
Known Limitations
Before using Dundas BI with Vertica, be aware of the following known limitations:
- BINARY, VARBINARY, LONGVARBINARY, TIME, TIMETZ, INTERVALSECONDS, INTERVALMONTH, and UUID data types are not supported.
-
For DECIMAL and FLOAT data types, values are rounded to 2 digits after the decimal.
-
NUMERIC data type supports up to 28 digits of precision and 2 digits of scale above which the following error is displayed:
Data Retrieval failed, as it was not possible to generate a valid query for the specified metric set. Specified argument was out of range of valid values.
- For TIMESTAMP and TIMESTAMPTZ data types, milliseconds are truncated.

