


laVertica Integration with Apache NiFi: Connection Guide
About Vertica Connection Guides
Vertica connection guides provide basic instructions for connecting a third-party partner product to Vertica. Connection guides are based on our testing with specific versions of Vertica and the partner product.
Vertica and Apache NiFi: Latest Versions Tested
| Software | Version |
|---|---|
| Open Source Tool |
Apache NiFi 1.22.0 |
| Desktop Platform |
Windows Server 2019 |
| Vertica Client |
Vertica JDBC driver 23.3.0-0 |
| Vertica Server |
Vertica Analytic Database 23.3.0-0 |
Apache NiFi Overview
Apache NiFi is a tool for automating and managing the flow of data between disparate data sources and destination systems. NiFi has a web-based user interface for design, control, feedback, and monitoring of dataflows. NiFi is an open source product designed for extensibility. NiFi lets you track dataflow from beginning to end and even modify the flow at runtime.
Installing Apache NiFi
- Navigate to the Apache NiFi Download page.
- Follow the download process using the specified keys.
- Follow the installation instructions in the Apache NiFi documentation.
Installing the Vertica Client Driver
Before you can connect to Vertica using Apache Nifi, you must install the Vertica JDBC client driver.
To install the driver:
- Navigate to the Vertica Client Drivers page.
- Download the JDBC driver.
Note For more information about client and server compatibility, see Client Driver and Server Version Compatibility in the Vertica documentation.
-
To install the Vertica JDBC driver on Windows, follow the instructions in Installing the JDBC Client Driver for Windows.
Connecting Apache NiFi to Vertica
Follow the steps in this section to connect NiFi to Vertica as both a source and a target data source.
Note You need to create two Apache NiFi processors: one for the data source connection and the other for the data target connection to the same database.
A NiFi processor encapsulates a set of actions on dataflows, incorporating data routing, transformation, and mediation between systems.
Starting Apache NiFi and Opening the User Interface
These instructions explain how to start Apache NiFi on Windows. To start Apache NiFi on other platforms, see the NiFi documentation.
- Start Apache NiFi by executing the
run-nifi.batxfile:installation_directory\bin\run-nifi.batx
- To open the Apache NiFi user interface, type this URL in your browser:
https://localhost:8443/nifiNote The URL for the Apache NiFi user interface is https://DataSourceName:8443/nifi. The port is 8443 by default.
You can change the port by editing the nifi.properties file in the NiFi conf directory.
Creating a Connection to Vertica as a Data Source
- In the Apache NiFi user interface, drag and drop the Processor icon to the center of the canvas.
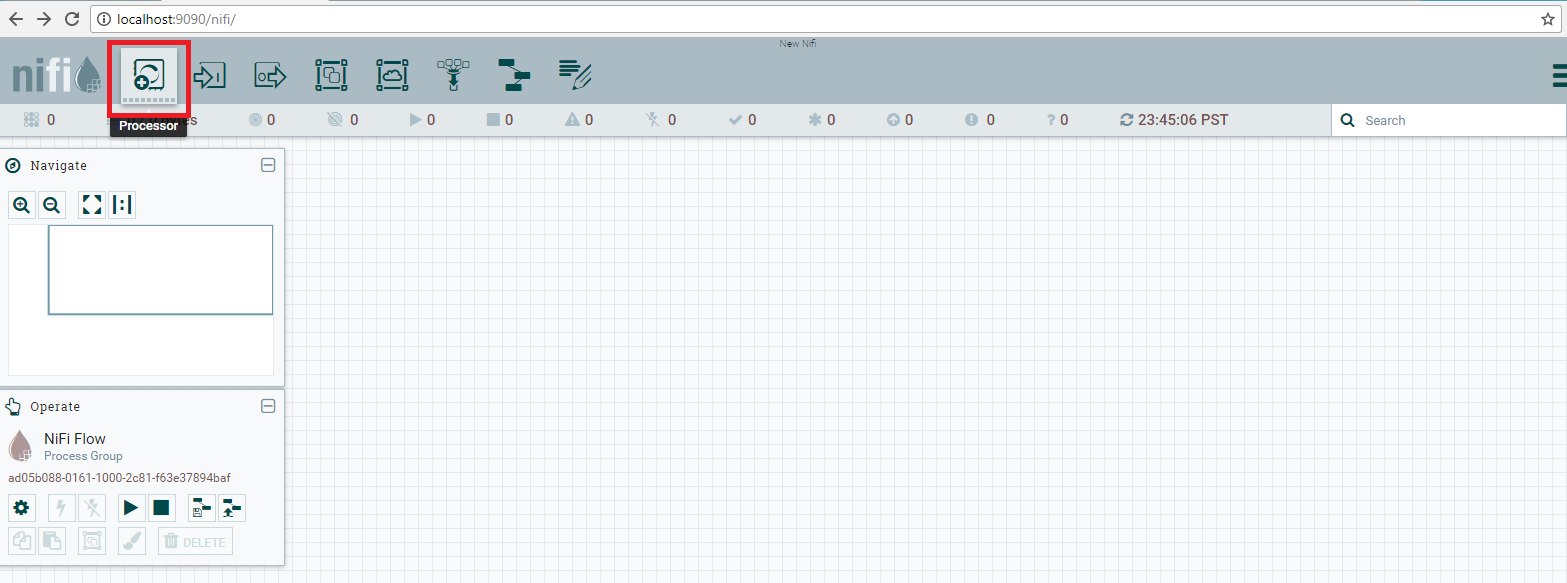
The Add Processor dialog box opens.
-
Select QueryDatabaseTable from the list of types.
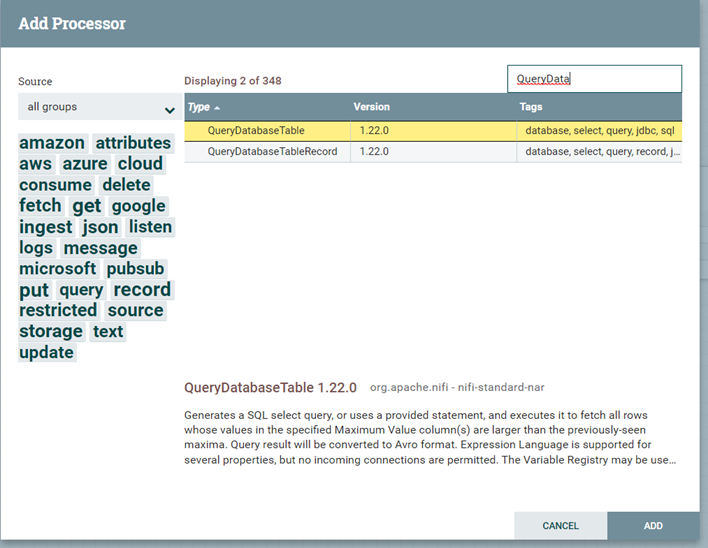
- Click Add.
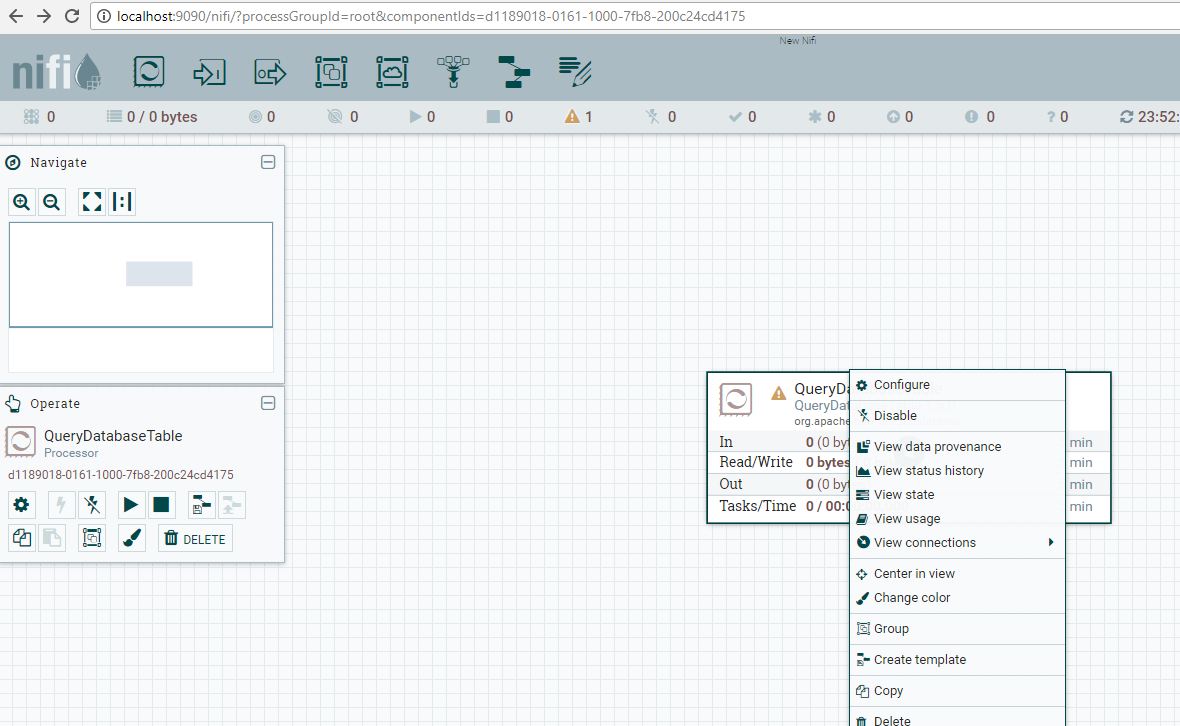
- Right-click the new processor on the canvas and select Configure.
- On the Configure Processor page, open the Properties tab.
-
Select Database Connection Pooling Service and click the Value box.
A pop-up is displayed.
Expand the list of values and select Create new service.
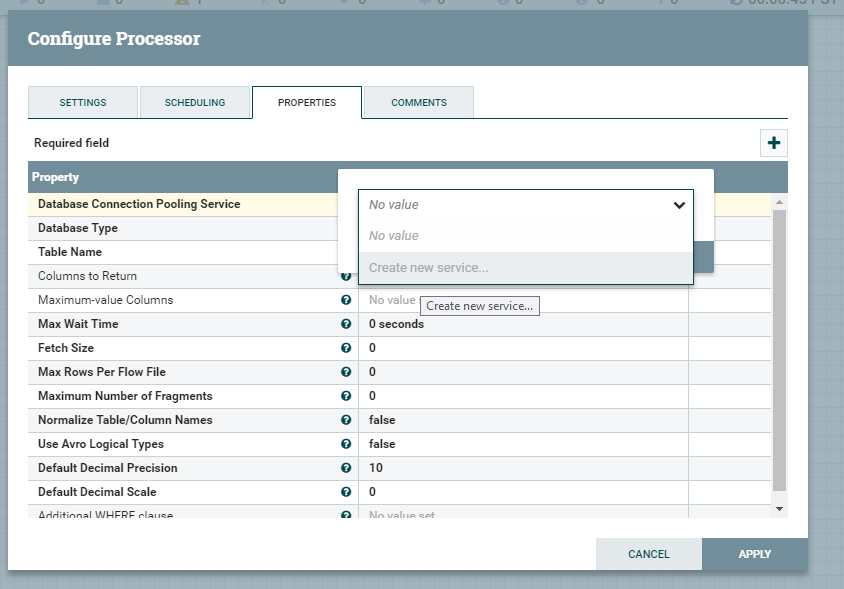
The Add Controller Service dialog box opens.
- In Compatible Controller Services, select DBCPConnectonPool 1.22.0.
In Controller Service Name, type a name for the service.
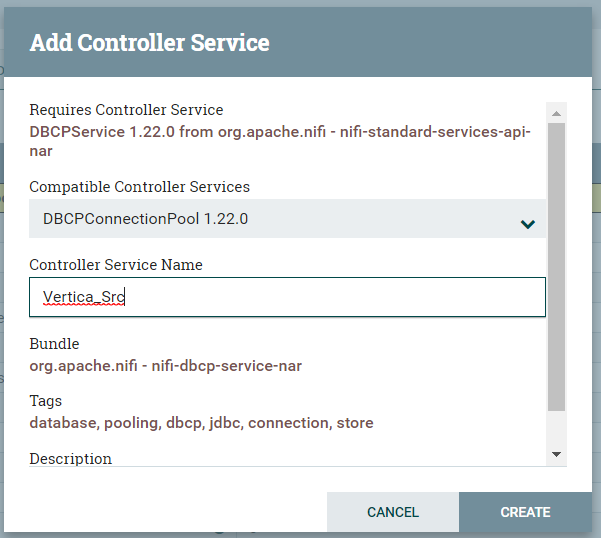
- Click Create.
-
Back on the Properties tab of the Configure Processor page, select Generic for Database Type and click the arrow icon.
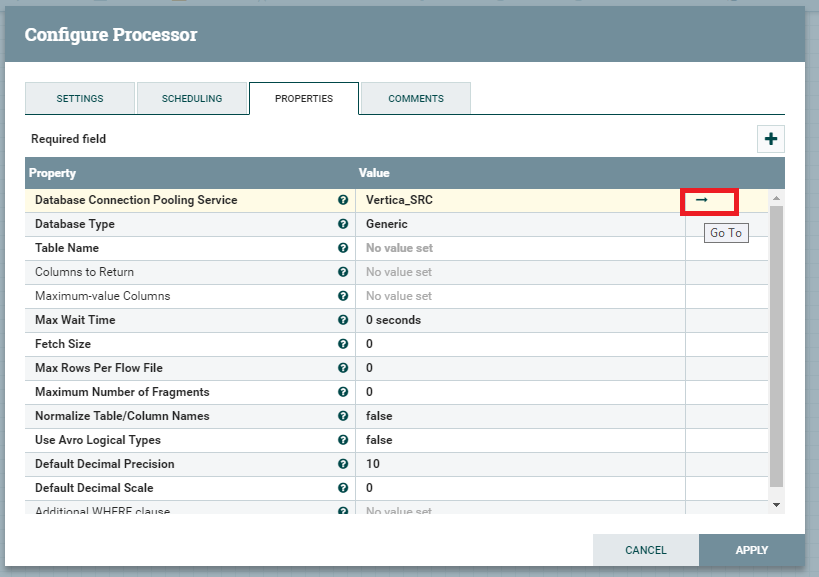
A message prompts you to save changes before going to the Controller Service. Click Yes.
The NiFi Flow Configuration page displays.
-
Select the controller service you created and click Configure.

The Configure Controller Service page appears.
-
Open the Properties tab and provide your database connection information:
- Database Connection URL: jdbc:vertica://IP_address:Port#/Database_Name
- Database Driver Class Name: com.vertica.jdbc.Driver
- Database Driver Location(s): Base_Location/vertica-jdbc-11.0.0-0.jar
- Database User: Database_UserName
- Password: Database_Password
Note Base_Location is the path where you downloaded the JDBC jar file.
- Click APPLY.
-
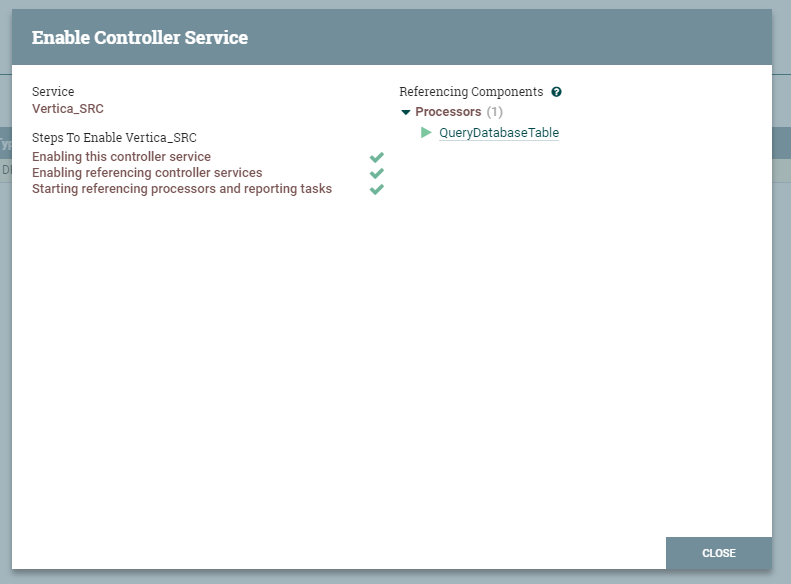
To enable the new Controller service, click Enable.

-
Click Close.
You can now use Apache NiFi to query data in Vertica. To enable write access, follow the steps in the next section.
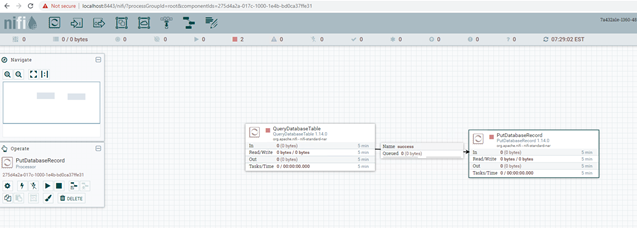
Creating a Connection to Vertica as a Data Target
- Create a new processor by dragging and dropping the Processor icon to the center of the canvas.
- In the Add Processor dialog box, select database from the list of groups and PutDatabaseRecord from the list of types. Click Add.
- Right-click the new processor on the canvas and select Configure.
- On the Configure Processor page, open the Properties tab.
-
Select Record Reader and click the Value box.
A pop-up appears.
Expand the list of values and select Create new service.
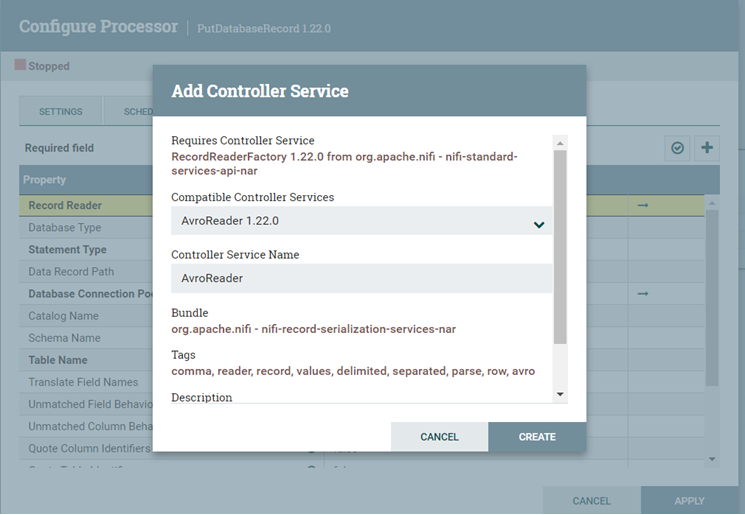
The Add Controller Service dialog box opens.
-
In Compatible Controller Services, select AvroReader 1.22.0.
In Controller Service Name, type a name for the service.
Note The DBCPConnectionPool controller service we used for the data source connection generates and executes a SQL SELECT statement to fetch data from Vertica. The query result is converted by this controller to Avro format. For this reason, we need to use the AvroReader controller service to convert the Avro format to records that can be written to the Vertica target.
- Click CREATE.
- Back on the Properties tab of the Configure Processor page, select Statement Type and expand the list of values.
Select the type of write operation that you want to allow in this connection. The choices include: INSERT, UPDATE, DELETE.
- Click the right arrow icon.
A message prompts you to save changes before going to the Controller Service. Click Yes.
The Apache NiFi Flow Configuration page appears.
- Select the controller service you have created and click Configure.

The Configure Controller Service page appears.
-
Open the Properties tab and provide your database connection information:
- Database Connection URL: jdbc:vertica://IP_address:Port#/Database_Name
- Database Driver Class Name: com.vertica.jdbc.Driver
- Database Driver Location(s): Base_Location/vertica-jdbc-11.0.0-0.jar
Note Base_Location is the path where you downloaded the JDBC jar file.
- Database User: Database_UserName
- Password: Database_Password
- Click APPLY.
- To enable the controller processor, click Enable.
- Click Close.
Now you can use Apache NiFi to read data from a Vertica source or write data to a Vertica target.
Known Limitations
-
UUID, INTERVAL MONTH, INTERVAL SECOND, VARBINARY, and LONG VARBINARY data types are not supported.
- For TIME, TIMETZ, TIMESTAMP, and TIMESTAMPTZ data types, milliseconds are truncated.

